Front door trim panel removal
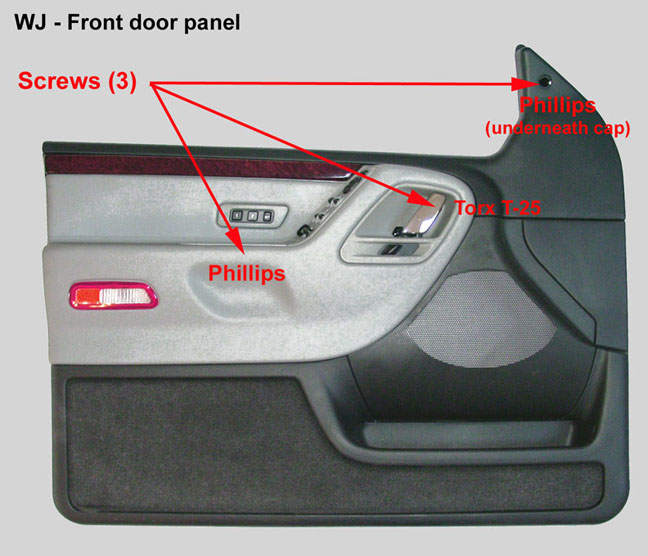
1. Location of screws
| |
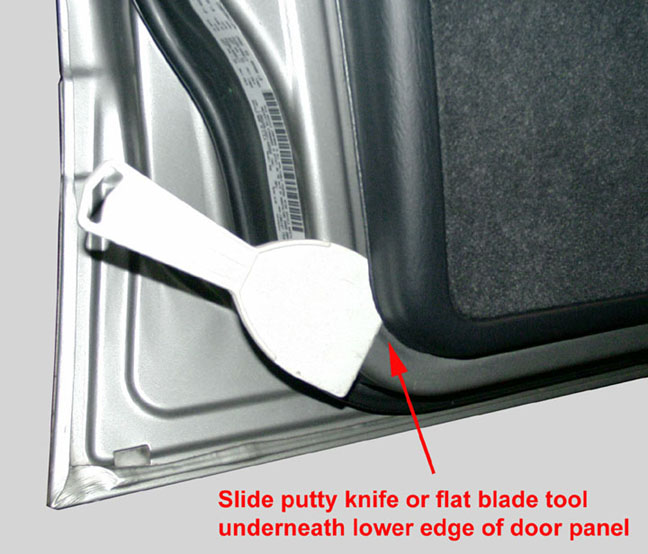
2. Initial pry location
|
1. Remove the 3 door panel screws, location as shown in the left photo above:
- Phillips head, located inside the pull-handle pocket tray.
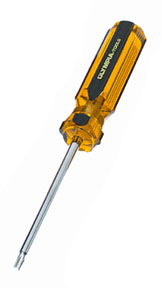
- Torx screw, located behind the chrome door handle. This is also referred to as a "nutsert" and requires a Torx T-25 bit. The opening to access the screw is very small, screwdriver-style T-25 works best.
- Phillips head screw, located on the upper right top area (by the mirror bezel). It is covered by a round plastic trim plug that needs to be popped out (a small flat screwdriver works best for this).
|
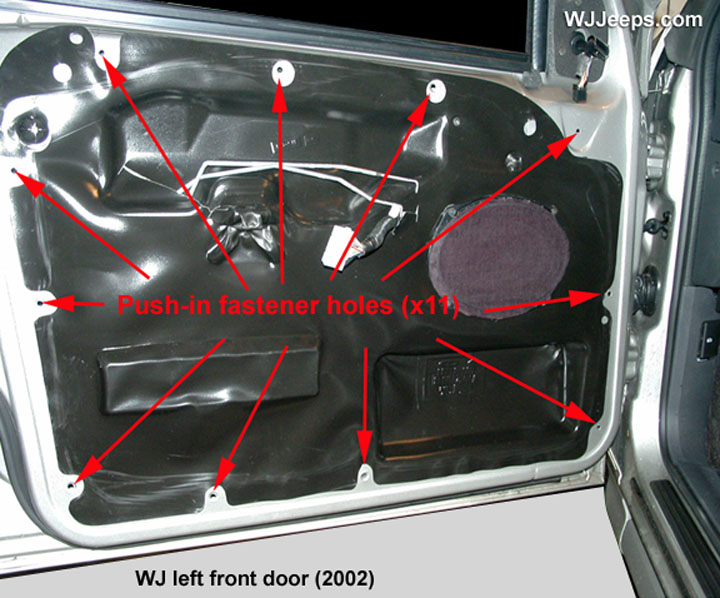
2. Using a trim removal tool (Miller tool # C-4829 or similar), detach each of the 11 plastic trim panel fasteners. The easiest method I have found is to use a hard plastic putty knife to pry one of the bottom lower fasteners loose. You can reach behind the blade with your fingers to help pry it out. Once that is done you can reach underneath with your fingers and pull the door trim off by hand, slowly working around the edges to pop the rest of the fasteners loose as you go along. Do not let the panel fall, hold it somewhat in place until all of the wiring and rods are disconnected.
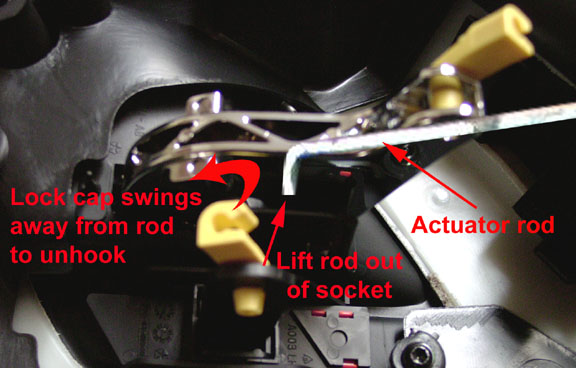
3. Actuator rod removal
3. While carefully holding the loose trim panel out from the door a few inches, reach inside and remove both of the metal actuator rods. They are secured with yellow snap-on plastic retainer clips that need to be pried out and away from the sides of the metal rod. Lift the rods straight up and out of their sockets.
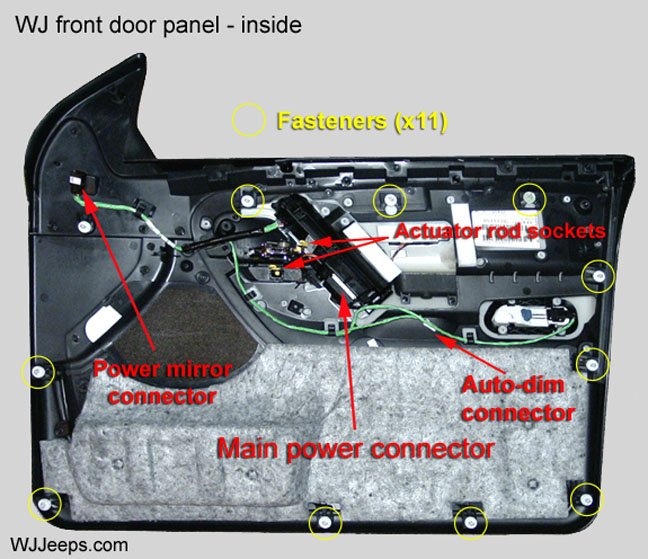
4. Unhook the large 15-pin white wiring connector by pressing in on the tab on the bottom side of the connector. Vehicles with the day/night mirrors will have an additional 2-pin white connector coming out of the main harness to unplug. Disconnect the 12-pin mirror connector from the short mirror harness. All wiring connectors have a tab on one side that needs to be pushed in to disengage them.
Front door panel fastener and connector locations
Rear door trim panel removal
1. Location of screws
| |
2. Initial pry location
|
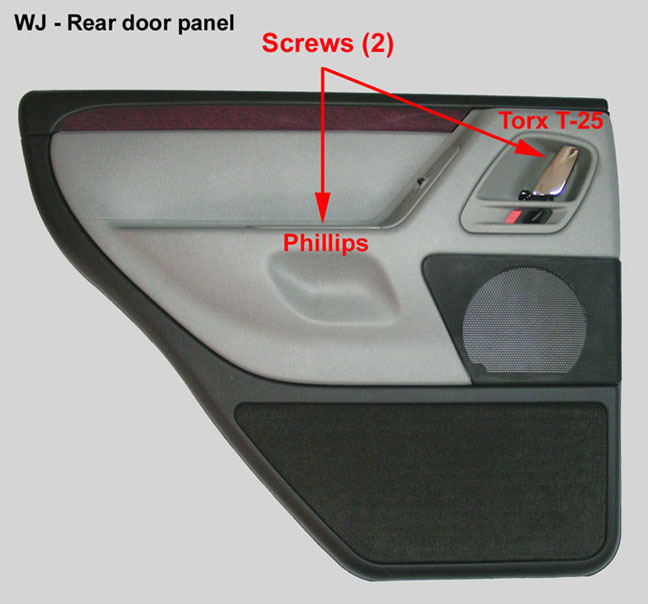
1. Remove the 2 door panel screws, located as shown in the left photo above:
- Phillips head, located inside the pull-handle pocket tray.
- Torx screw, located behind the chrome door handle. This is also referred to as a "nutsert" and requires a Torx T-25 bit. The opening to access the screw is very small, a screwdriver-style T-25 works best.
|
2. Using a trim removal tool (Miller tool # C-4829 or similar), detach each of the 9 plastic trim panel fasteners. The easiest method I have found is to use a hard plastic putty knife to pry one of the bottom lower fasteners loose. You can reach behind the blade with your fingers to help pry it out. Once that is done you can reach underneath with your fingers and pull the door trim off by hand, slowly working around the edges to pop the rest of the fasteners loose as you go along. Do not let the panel fall, hold it somewhat in place until all of the wiring and rods are disconnected.
3. While holding the loose trim panel in place, remove both of the metal actuator rods. They are secured with yellow snap-on plastic retainer clips that need to be pried away from the side of the metal rod. Lift the rods straight up and out of their sockets.
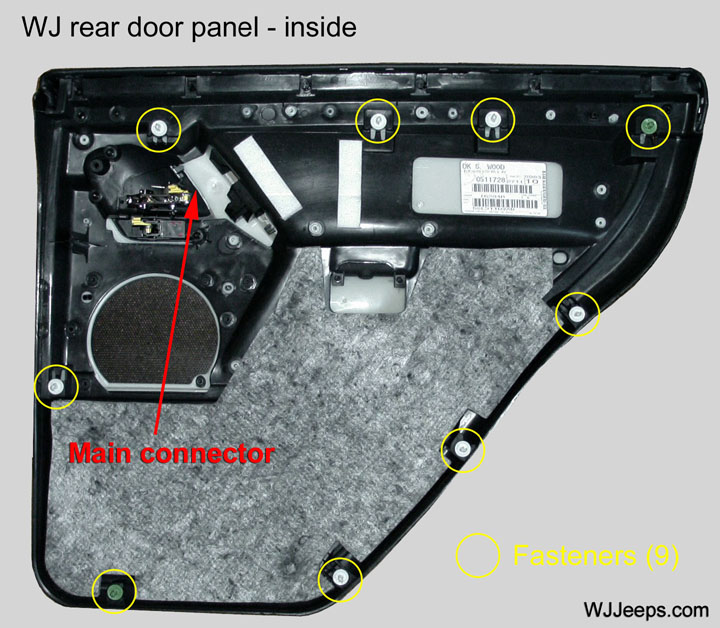
4. Unhook the large 15-pin white wiring connector by pressing in on the tab on the bottom side of the connector.
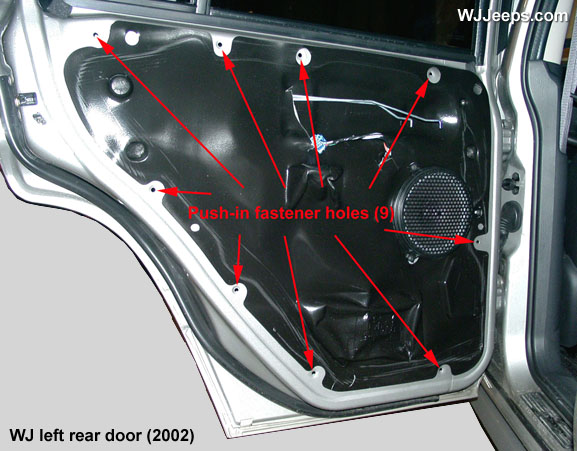
Rear door panel fastener and connector locations
Front and rear panel installation
1. Verify that all plastic connectors (10 on the front doors, 9 on the rear doors) are attached to the trim panel, that none are left in the door, and that none are damaged. Check all wiring to make sure it is routed correctly under all of the tabs along its path. Hold the door panel parallel to the door. Reach inside and reconnect the large main electrical connector, and for the front drivers door the two-pin white memory mirror connector if equipped. Reattach both metal rods and snap their lock clips into place. On the front doors, reconnect the 12-pin mirror connectors.
Note: If you have performed any repairs, additions or modifications to components inside the door panels, it is a good idea to test them before continuing with the final installation of the panels. The panels can be held in place with just one or two of the plastic fasteners while this is being done.
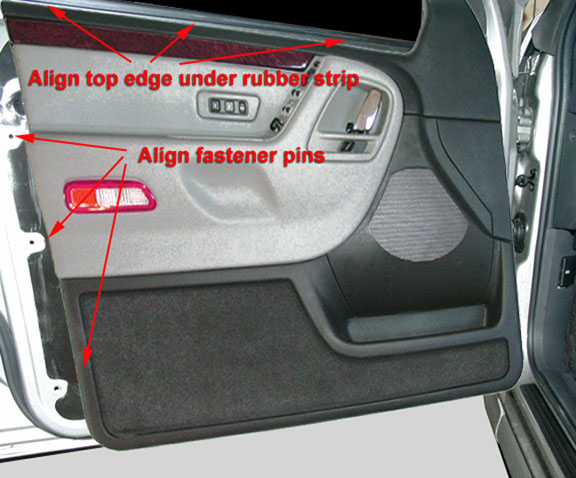
| 2. Aligning the door trim panel in place |
2. Angle the trim panel out from the bottom and align the top edge first, roughly fitting it into the window channel rubber strip. On the left top inside of the panel, align the first two fasteners on the side edge with the holes in the door, and with a hard tap of your palm press each one into place. Make sure that the right side of the door panel is aligned in its approximate location. From the left side, continue counter-clockwise down and around the entire perimeter of the door, securing each fastener.
3. Verify that the door panel is secured tightly around its entire perimeter. Check that the rubber strip at the bottom of the window channel goes over the trim panel.
4. Reinstall the phillips screws and the torx screw. For the front doors, install the plastic trim plug covering the upper screw.
